


| SATGUI Administration GUI - (SATADMIN) |
|
| Home | SATGUI | SATSHELL | SATFORM | SATFILTER | SATREPORT | SATMYSQL | License | Download | Examples | Contact |
| Overview |
The SATGUI Administration GUI (SATADMIN) provides a facility to Administer/Monitor/Control a SATGUI Server with an easy to use GUI interface.
The SATADMIN GUI is generated using SAT/DL, and therefore uses a standard SATGUI client. All that is required to "activate" the SATADMIN facility is to setup a user called "satadmin". Commands for the user "satadmin" are handled internally by the server and do not have associated screen/process files.
NOTE: Please make sure you are familiar with configuring Users and Profiles before using SATADMIN.
| Setting up SATADMIN |
In order to setup SATADMIN all that is required is to create a user called "satadmin".
| SATADMIN Toolbar Options |
All SATADMIN toolbar options make use of the "balloon help" facility.
| Button | Action |
 | Refresh screen. Updates screen to reflect current situation. Clears entry fields. |
 | Display Connections Screen. |
 | Display Users Screen. |
 | Display Profiles Screen. |
 | Display Activity Summary Screen. |
 | Stop Server (Activity Summary), Kill Connection (Connections). |
 | Save User/Profile. |
 | Delete User/Profile. |
| Display Server Activity Summary |
After logging in as "satadmin" the following screen is displayed:
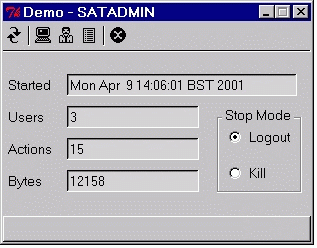
This screen shows:
NOTE: Number of actions/bytes transferred for SATADMIN Clients is not recorded.
| Stop Server |
The SATGUI Server may be stopped in one of two modes:
| Logout | Server stops when all outstanding actions have been completed (Default). |
| Kill | Server stops immediately. |
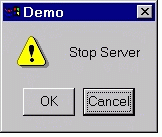
To stop the SATGUI Server:
The following "Action Confirmation" dialog is displayed:
| Monitor/Kill Connections |
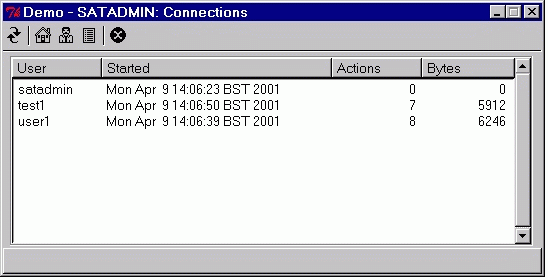
This screen shows (For each currently connected User):
To kill a Connection:
NOTE: The connection is killed immediately.
| Display/Add/Change/Delete Users |
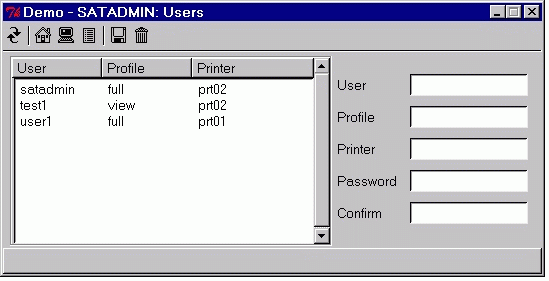
This screen shows (For all Users configured):
To add a new User:
Both the "Password" and "Confirm" fields must be entered, and must contain the same string. The string must be alpha numeric, spaces are not allowed.
NOTE: When entering Password/Confirm, each character entered is shown as "*", thus:

The fields are validated as follows:
| Field | Validation | Required |
| User | Alphanumeric and underscore | Yes |
| Profile | Alphanumeric and underscore | Yes |
| Printer | Alhpanumeric and underscore | Yes |
| Password | Alphanumeric | Yes (If new user) |
| Confirm | Alphanumeric | Yes (If password entered) |
The User details are added to the configuration and the screen is refreshed.
A screen similar to the following is displayed:
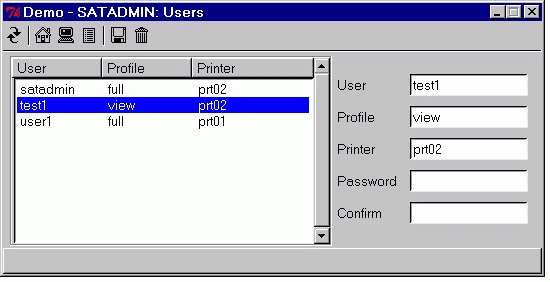
If the Password is to be changed, both the "Password" and "Confirm" fields must be entered, and must contain the same string. The string must be alpha numeric, spaces are not allowed.
The User details are updated and the screen is refreshed.
If the "User" field has been changed then a new User is added to the configuration. A Password must be set if a new User is to be configured.
NOTE: Changes to the User configuration do not effect currently connected Users.
| Display/Add/Change/Delete Profiles |
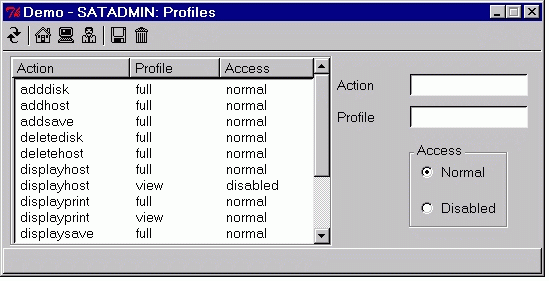
This screen shows (For all Profiles configured):
The fields are validated as follows:
| Field | Validation | Required |
| Action | Alphanumeric and underscore | Yes |
| Profile | Alphanumeric and underscore | Yes |
| Access | "normal" -or- "disabled" | Yes |
The Profile details are added to the configuration and the screen is refreshed.
A screen similar to the following is displayed:
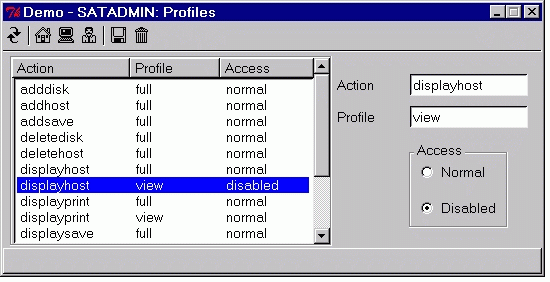
The Profile details are updated and the screen is refreshed.
If the "Action" -or- "Profile" fields have been changed then a new Profile entry is added to the configuration.
NOTE: Changes to the Profile configuration do effect currently connected Users.